Admin CMS
This is the other component getting generated besides the Swagger Docs, the admin panel (or CMS) is a modern UI interface for you (the app owner) to visually interact and manage data in your app.
Usage
1. Set Password For Admin
The moment you navigate to My App for the first time after you generate a new app, you will be asked to enter a password for the created-by-default admin account, afterwards, you will use this password to login to your admin account inside the admin panel/CMS.
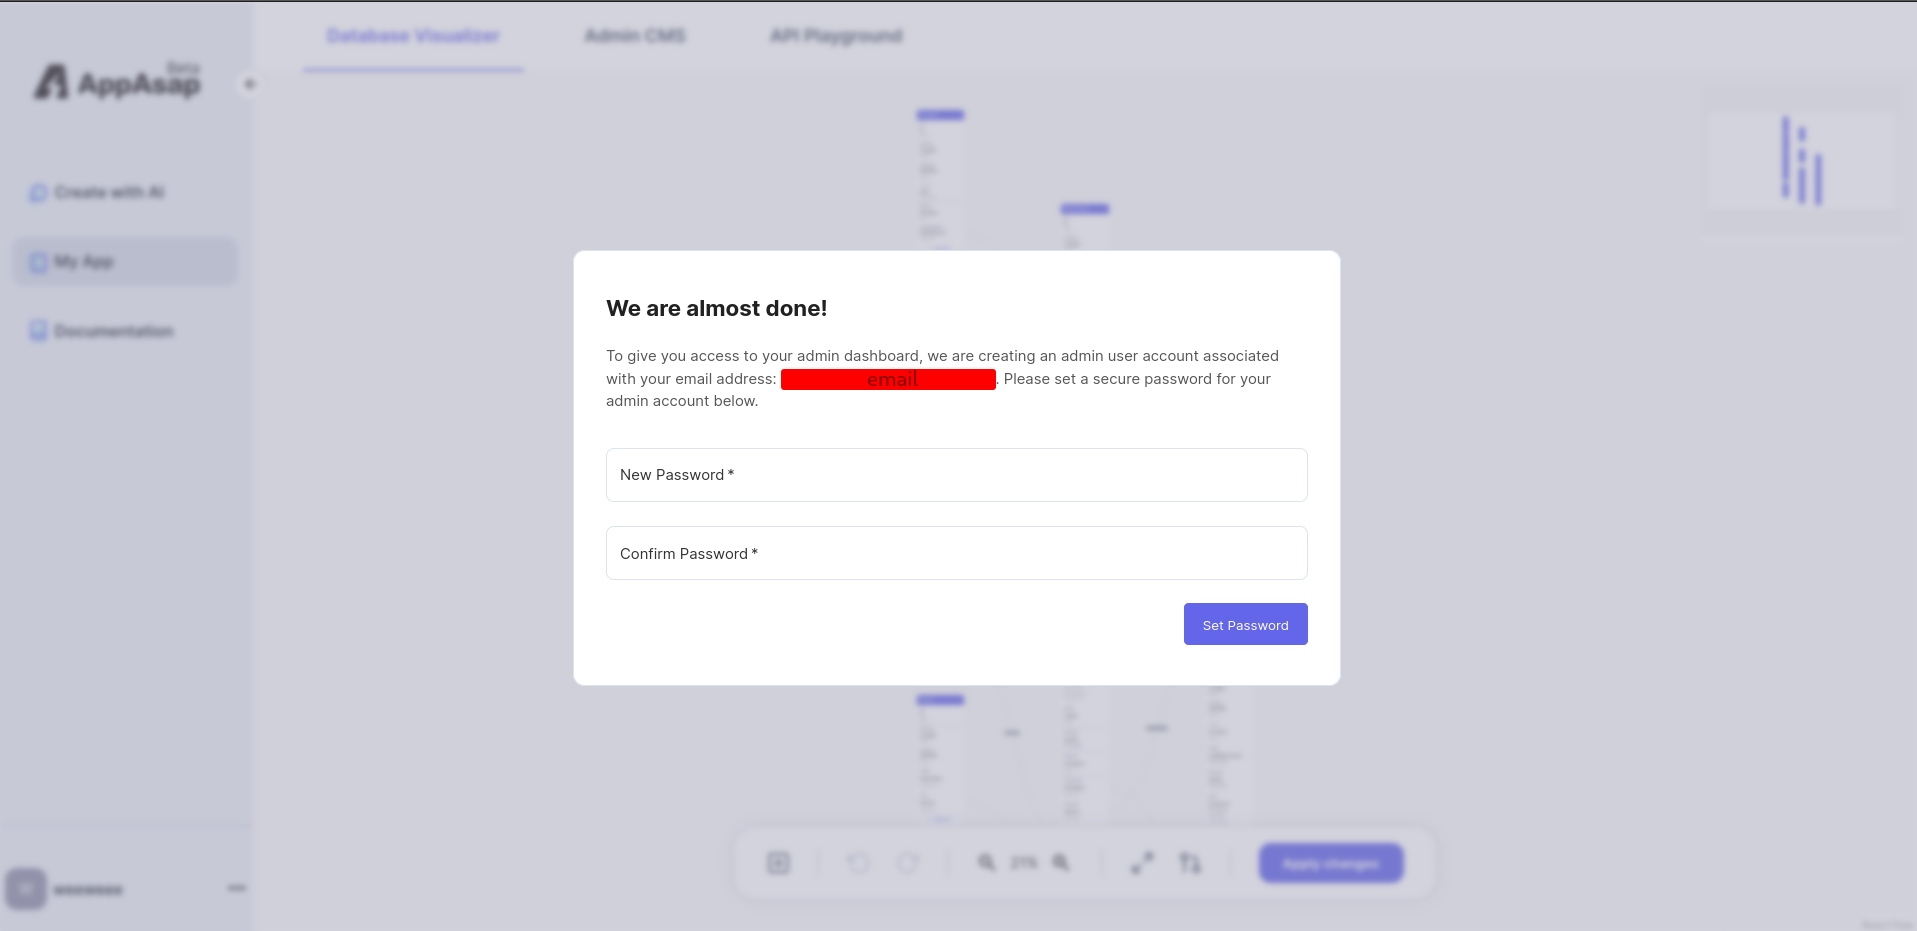
After setting the admin password, you will get automatically logged in to the Admin CMS and the API Playground.
2. Admin Home Page
Now you are logged in and redirected to the Admin Home Page, this is where you can fully interact with the admin panel and the data/tables/entities in your generated application.
Note that the permissions of the logged in user apply, so you can only do what you are permitted to do, this includes viewing, creating, updating, and/or deleting.
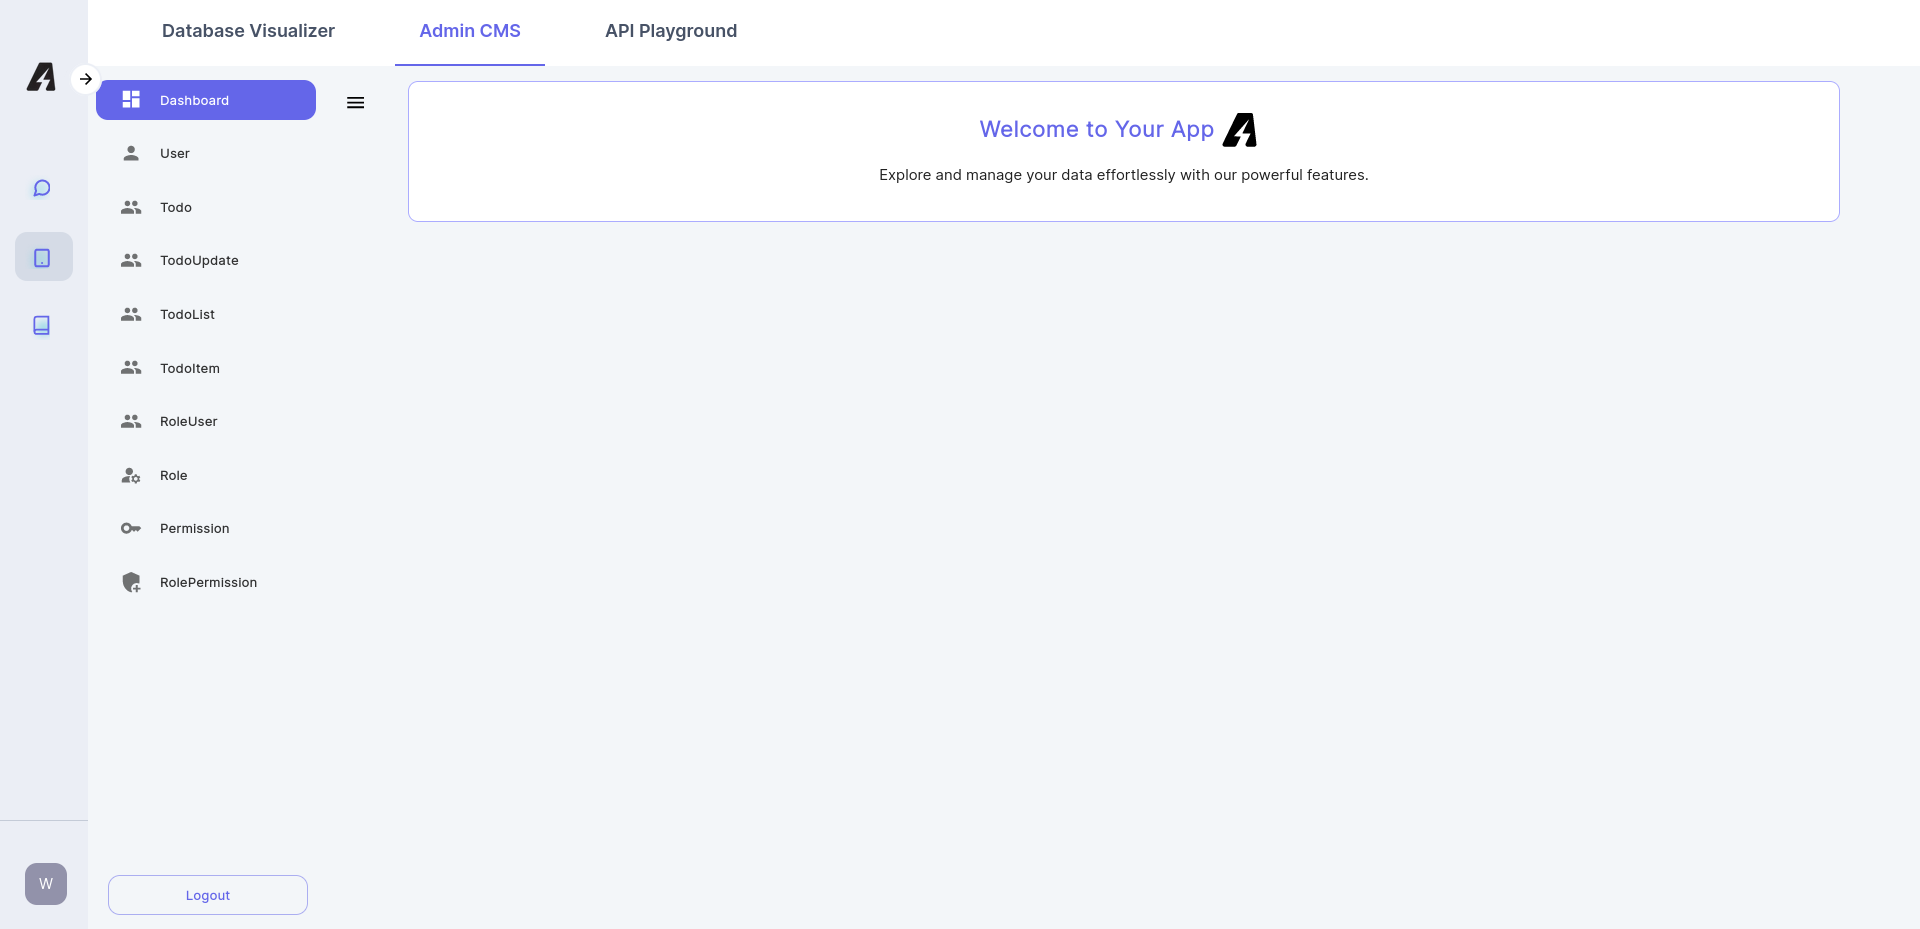
As you can see, the entities that were created during the generation phase would appear to the left and you can click on any one of them to manage this specific entity, below is an example for the Todo entity:
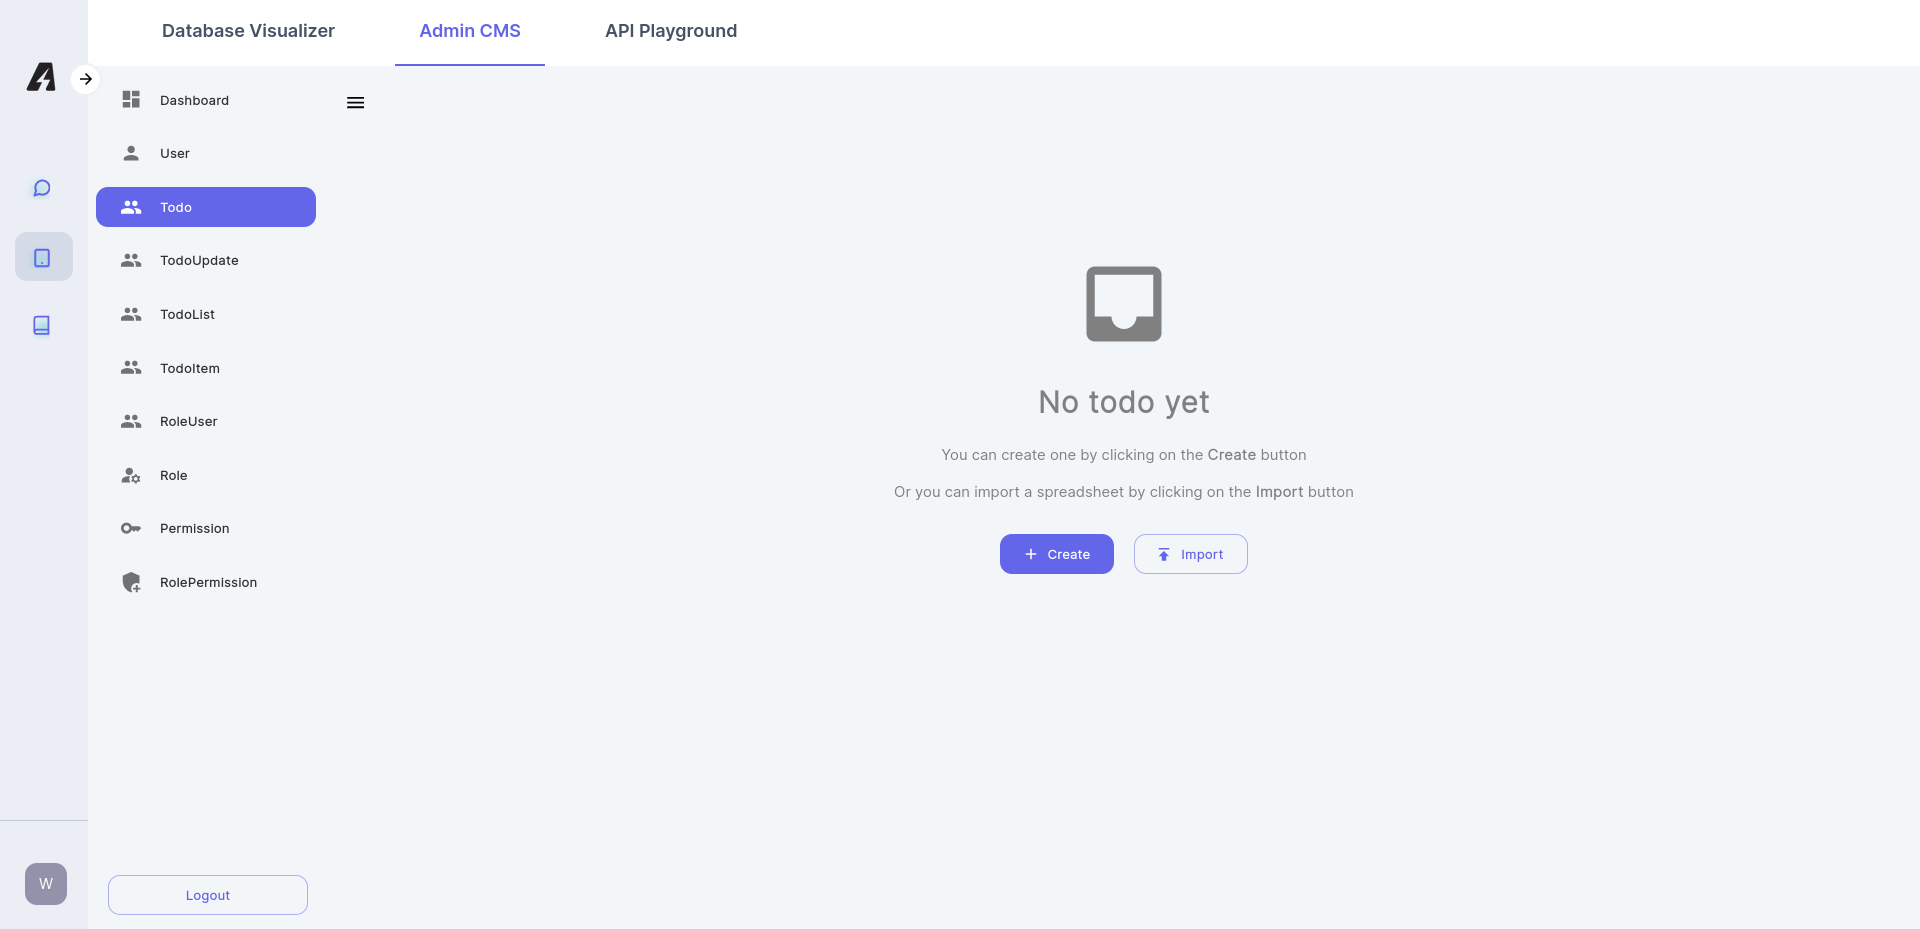
3. Entity Create
By default there would be no instances of that entity created, click on the + Create button (shown above) to start creating instances of that entity:
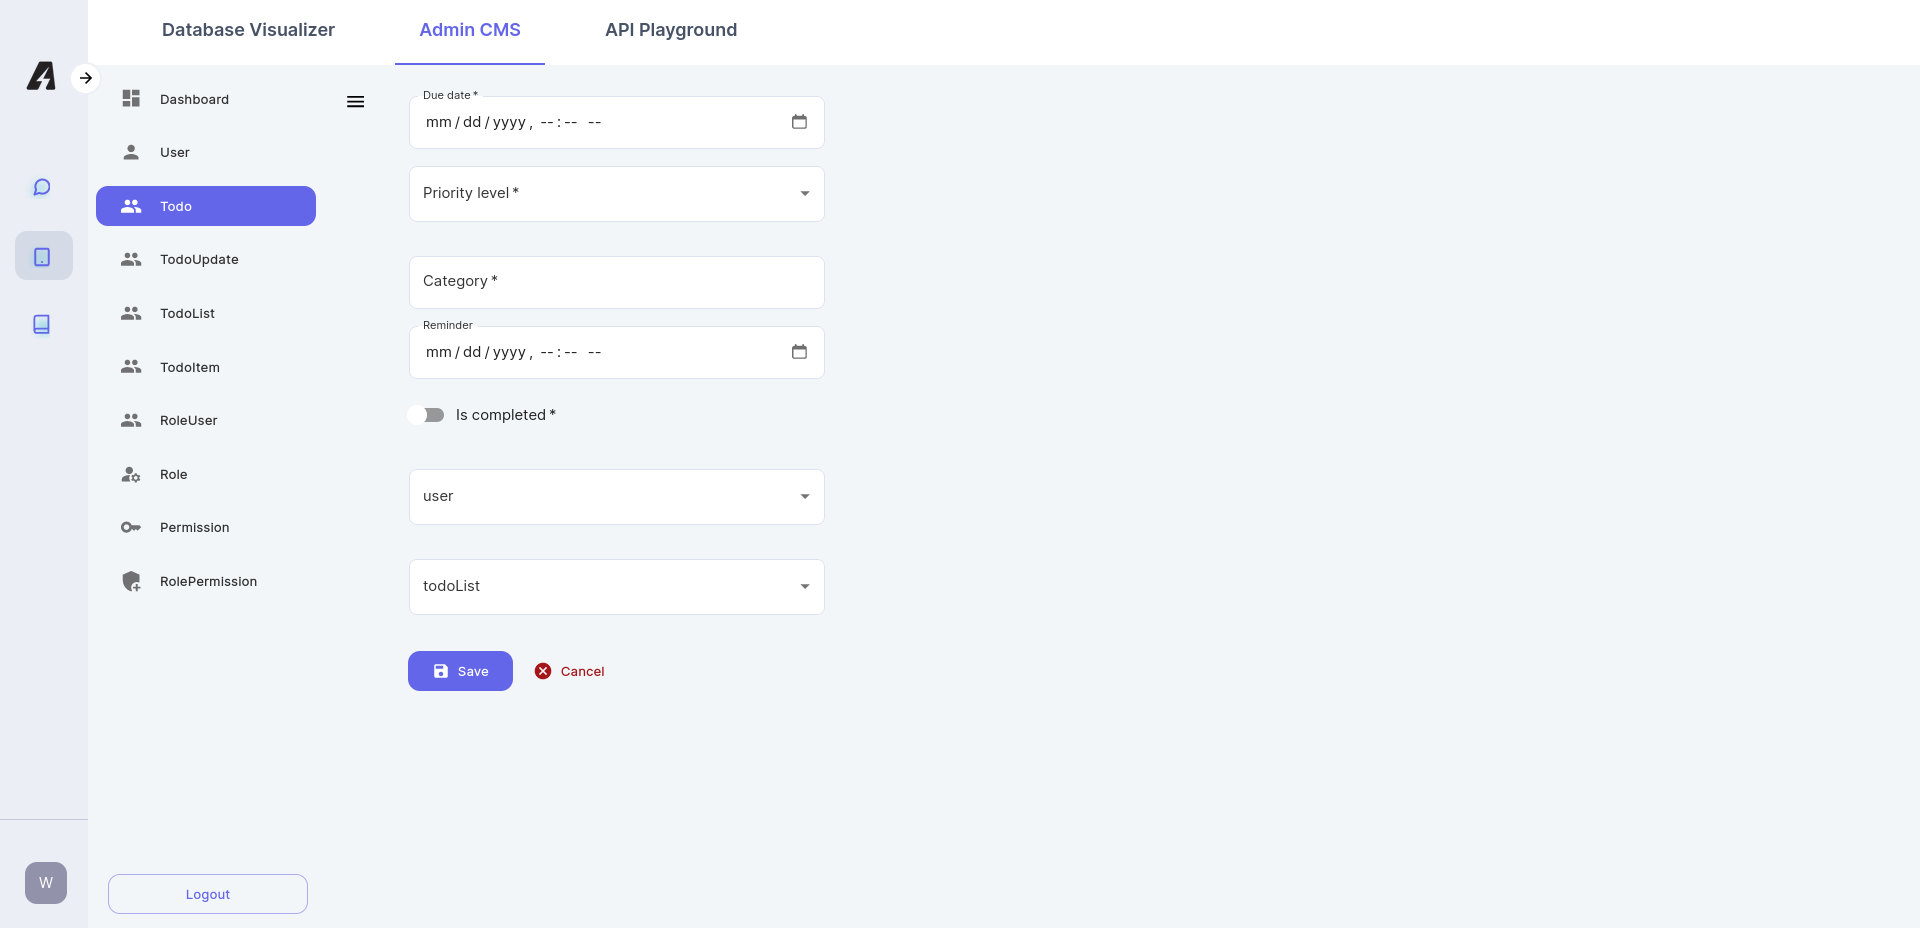
Fill the inputs with some valid data and click on the Save button to finish creating the entity:
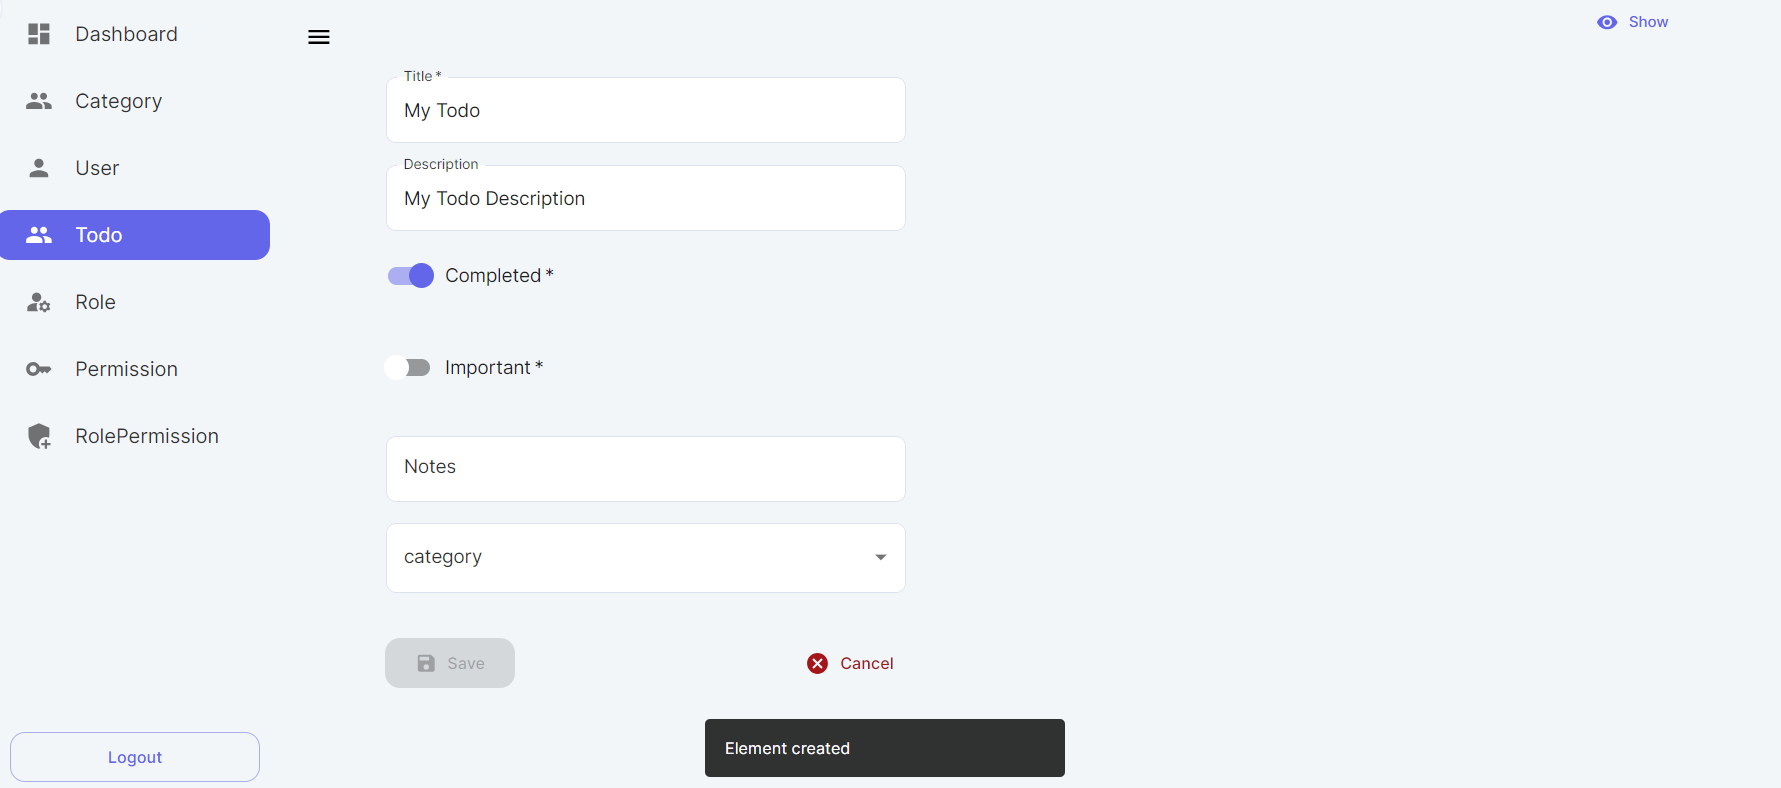
Note that some fields might be Optional in the database table for that entity, so as expected it wouldn't require you to enter it in the admin panel UI.
4. Create Lists on Entities
You can also create lists (columns with multiple values) of different types with ease, you will have a plus icon to add more to the list representing the column's value.
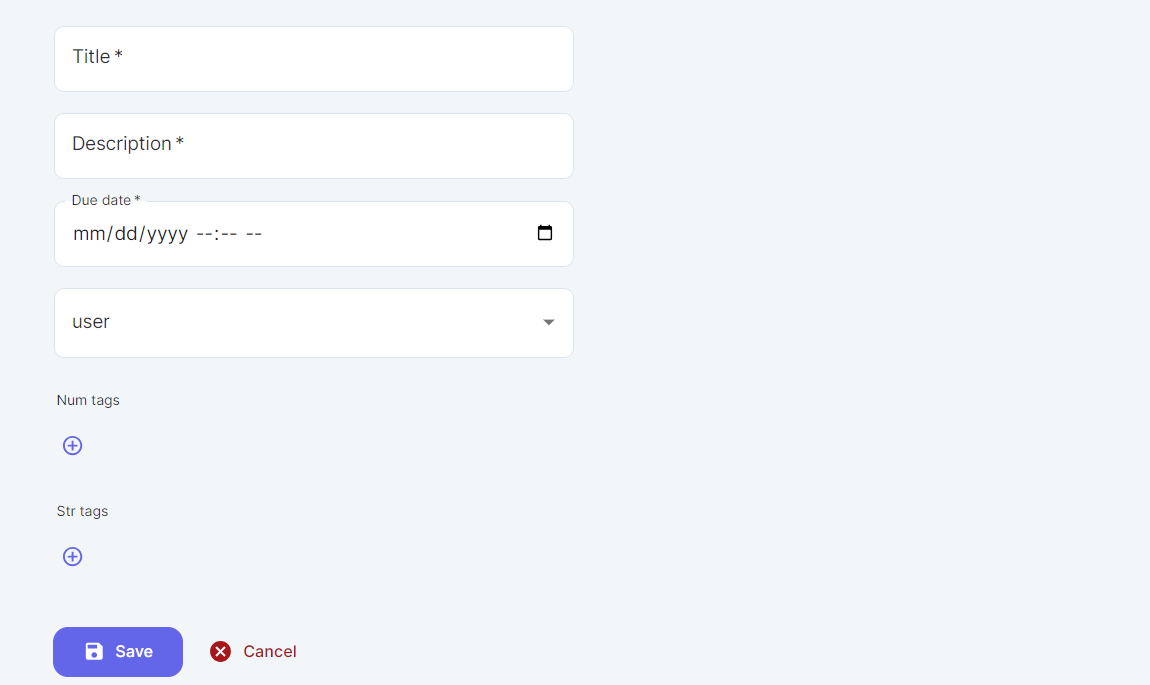
The values you add are validated and the admin panel will give you correct input type for each type (String, Numeric, etc...).
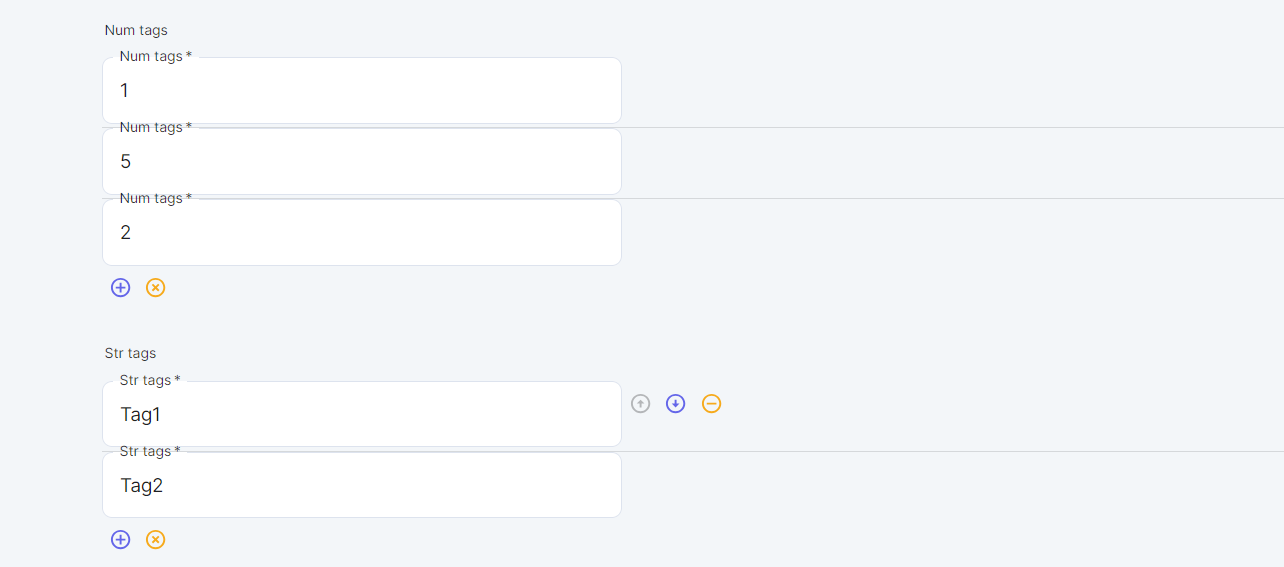
This is how the list columns (Num Tags and Str Tags) are presented in the admin panel:
Operations on Tables
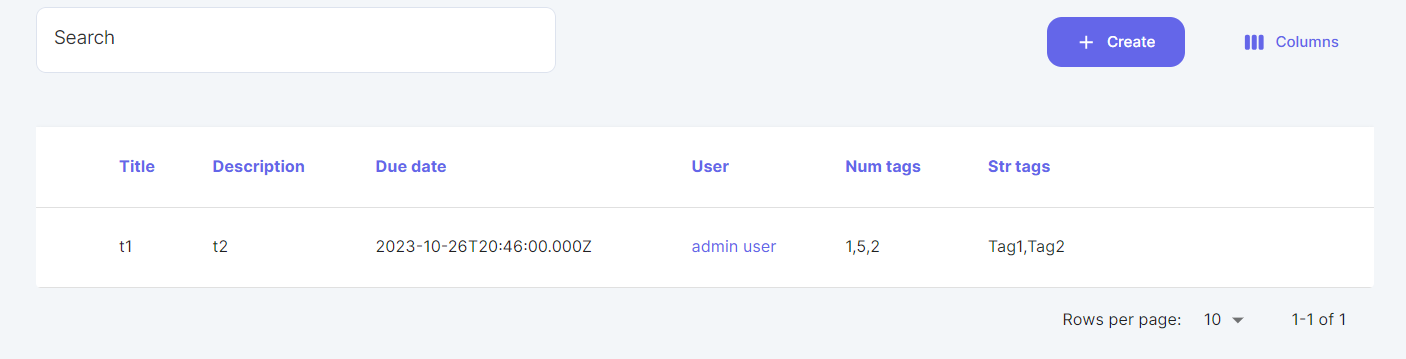
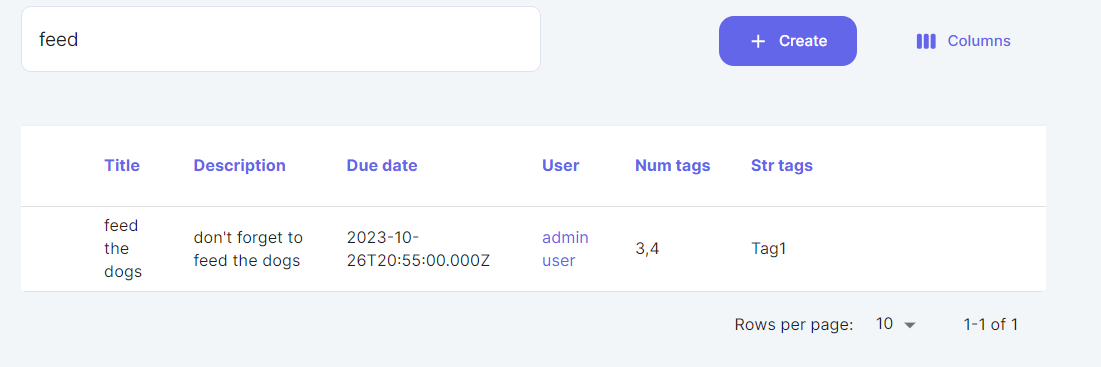
1. Searching
The admin panel provides an easy way to perform text search on your table:

The table showing the results will show only the results that satisfy the search criteria:
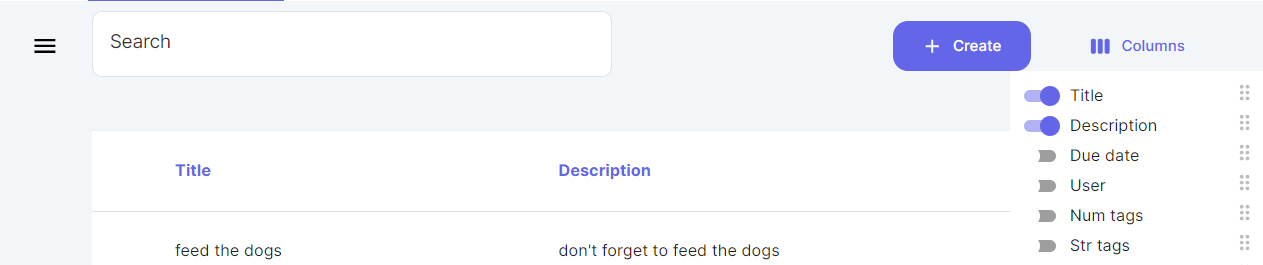
2. Selecting Columns
You can use the Select feature to show certain columns in your table and omit other columns.

If the switch is on it means that this column is included in the response, otherwise it is ommitted.
This is a result for selecting the Title and Description.
3. Export Data As CSV
You can also export your data as CSV.
Just click on the Export button.

It will automatically download a CSV file containing your data.
Files
For entities with at least one media type field, you will be able to upload/view/delete/update files related to that entity.
Usage
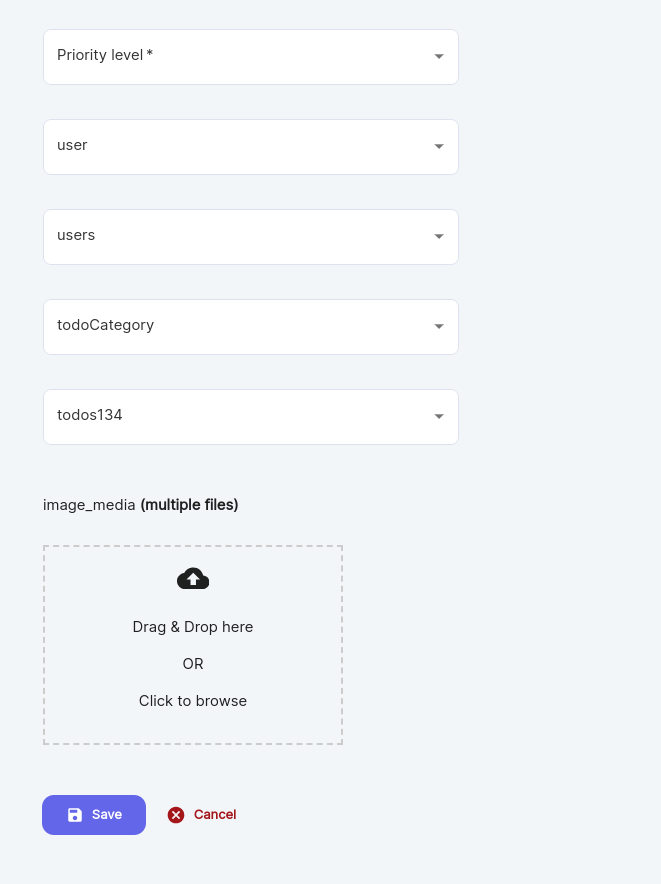
Navigate to an entity having one or more media fields, when creating a new row for that entity, you will find an upload area where you can either browse files or drag and drop:
Choose one or more files to upload (depending on whether you chose to support multiple values for that field or not):
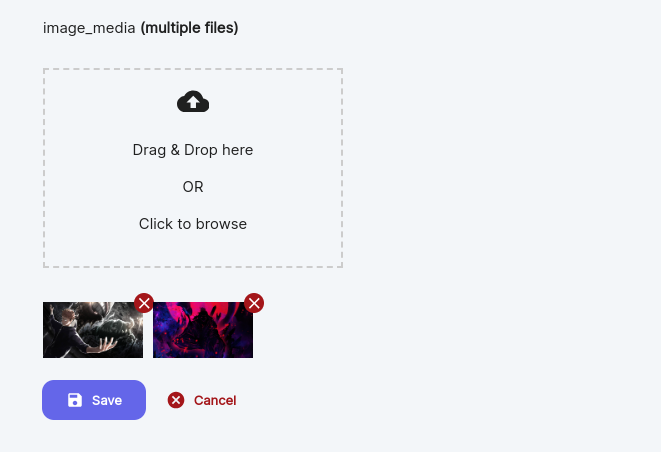
Click on Save to save upload your files, then you can navigate to the added row and preview your files:
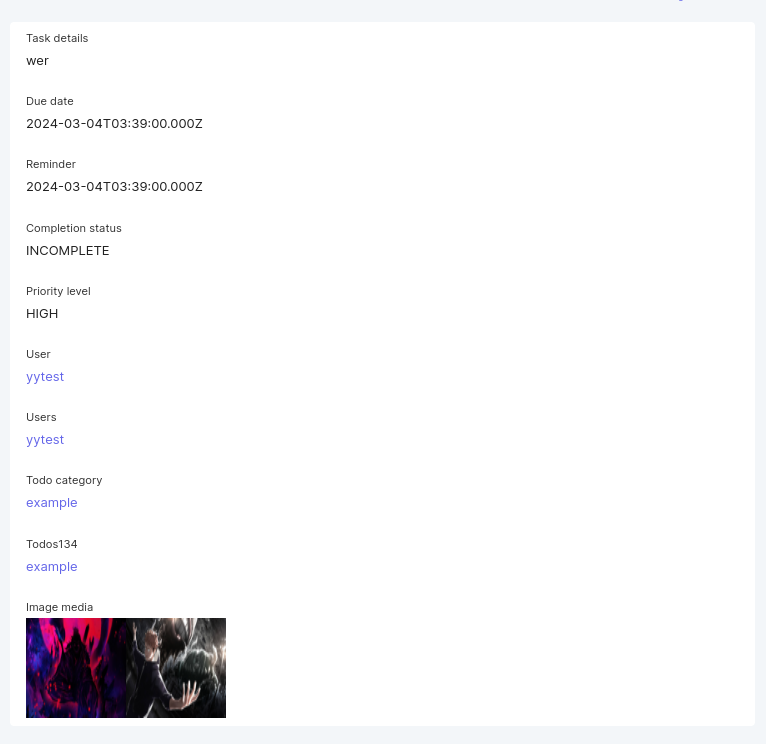
To edit/delete files, click on Edit:

Remove images or re-upload others as you wish, then click Save to apply:
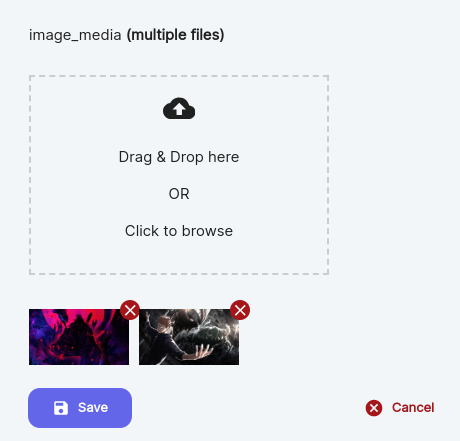
Note that we don't have good support for videos and audio yet, but those are coming soon, and the max file size to upload is 5MB.